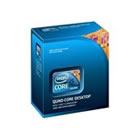
 The level of technical innovation changes rapidly so a processor upgrade to your Windows computer may not be the best choice if you wish to gain the best improvements in raw processing power.
This is because a computer that's only a couple of years old may no longer have a suitable CPU upgrade path i.e. your motherboard may not even support the latest and fastest CPU's.
Before you even decide on a new processor check your motherboard manual or use diagnostic software to determine what type of CPU socket you have.
A good all round tool for checking out parts of your PC is SiSoftware Sandra. Download the Free Lite Version from the Download Site for Sandra Lite. The free version is good but does remove a lot of the functionality of the paid version.
Another useful tool is CPU-Z. which gathers information on the main devices of your system including the CPU, motherboard, memory and DirectX version. This is also Free to download.
When performing your research for a new CPU pay particular attention to the front side bus (FSB), the form factor of your motherboard, the socket type, the chipset support and its core voltage.
The FSB connects the computer's processor to the system memory (RAM) and other components on the motherboard. These components include the system chipset, AGP/PCI card, AGP/PCI devices and other peripherals.
The speed of the frontside bus is measured in Megahertz or Gigahertz, just like the CPU.
Most computers' processors run faster than their system buses, so the FSB speed is typically a ratio of the processor speed. For example, a processor that runs at 2.4 GHz may have an FSB speed of only 400 MHz. The CPU to FSB ratio would therefore be 6:1. The smaller this ratio is, the more efficiently the processor can work. Therefore, faster frontside bus speeds lead to faster overall performance.
To improve performance, modern motherboards feature a back side bus that directly connects the CPU to special cache (memory) reserves. These CPU cache reserves are commonly known as Level 2 (L2) and Level 3 (L3) cache. The CPU will store frequently accessed data here for quick retrieval.
Also in modern computers systems, AGP and PCI slots, both Standard and Express, use their own buses for processing graphic data directly, relieving the FSB of traffic. This helps boost benchmarks and also improves video processing for gaming and streaming multimedia applications like movies.
If your personal computer already has a top-of-the-line CPU then your upgrade options may be limited as any upgrade would bring very little benefit (You may get much better results by upgrading your PC's memory and/or Graphics card).
However, if there is a massive leap in raw processing power and your motherboard can accept the upgraded processor the rest of this article shows you how to do this.
First, armed with your research, make sure you buy the right processor for your PC.
Now unplug your computer from the mains wall socket and open your PC's case. Before you start the upgrade ground yourself to prevent any static damage.
 Now unplug the CPU's fan from its power source and remove the Heatsink and fan.
You may need to use a flathead screwdriver to push down the clips holding the Heatsink to the CPU socket.
Now carefully remove your old processor by lifting it out of its socket. It should be easy to remove, so do not use any excessive force as this could cause unwanted damage to your motherboard.
Insert the new processor (CPU), being sure to match the pins to the holes. The CPU will only fit in one direction and will not require any force to insert it. If you need to force it in, the CPU is the wrong way round.
If your existing Heatsink does not have some already, apply a thin layer of thermal compound to the top of the CPU, or to the underside of the Heatsink.
Now place the Heatsink unit on top of the CPU, being sure to place it in such a way that the CPU is completely flush against the bottom of the Heatsink. Again, you may need a flathead screwdriver to carefully clip the Heatsink to the CPU. Be very careful with this step so as not to damage the CPU or the motherboard.
Tip: If you power up your system without the Heatsink properly attached, you will cause permanent damage to the CPU.
Finally attach your CPU's Fan to the top of your Heatsink (it may already be attached) and plug the CPU fan into the proper power source.
Before closing the case and finalising the installation, plug in and turn on your computer to verify that the new CPU is working properly and confirm that the CPU fan is spinning properly. Carefully touch the Heatsink to make sure it is warm and not hot. Check the CPU temperature in the BIOS to make sure the temperature is not rising rapidly or use a software tool to check this for you. Also verify that you can successfully boot into your Windows Operating System.
If all of the above check out, you have successfully upgraded your computers CPU.
Power down the computer, close the case, and enjoy your new and faster CPU.
If, on the other hand, the results are not what you expected, see our articles PC System Fails CPU Test and Motherboard Problems.
Read more articles about PC repairs, Web design & SEO